Complete Guide to Install SQL Server 2012 in Windows Server 2012 R2
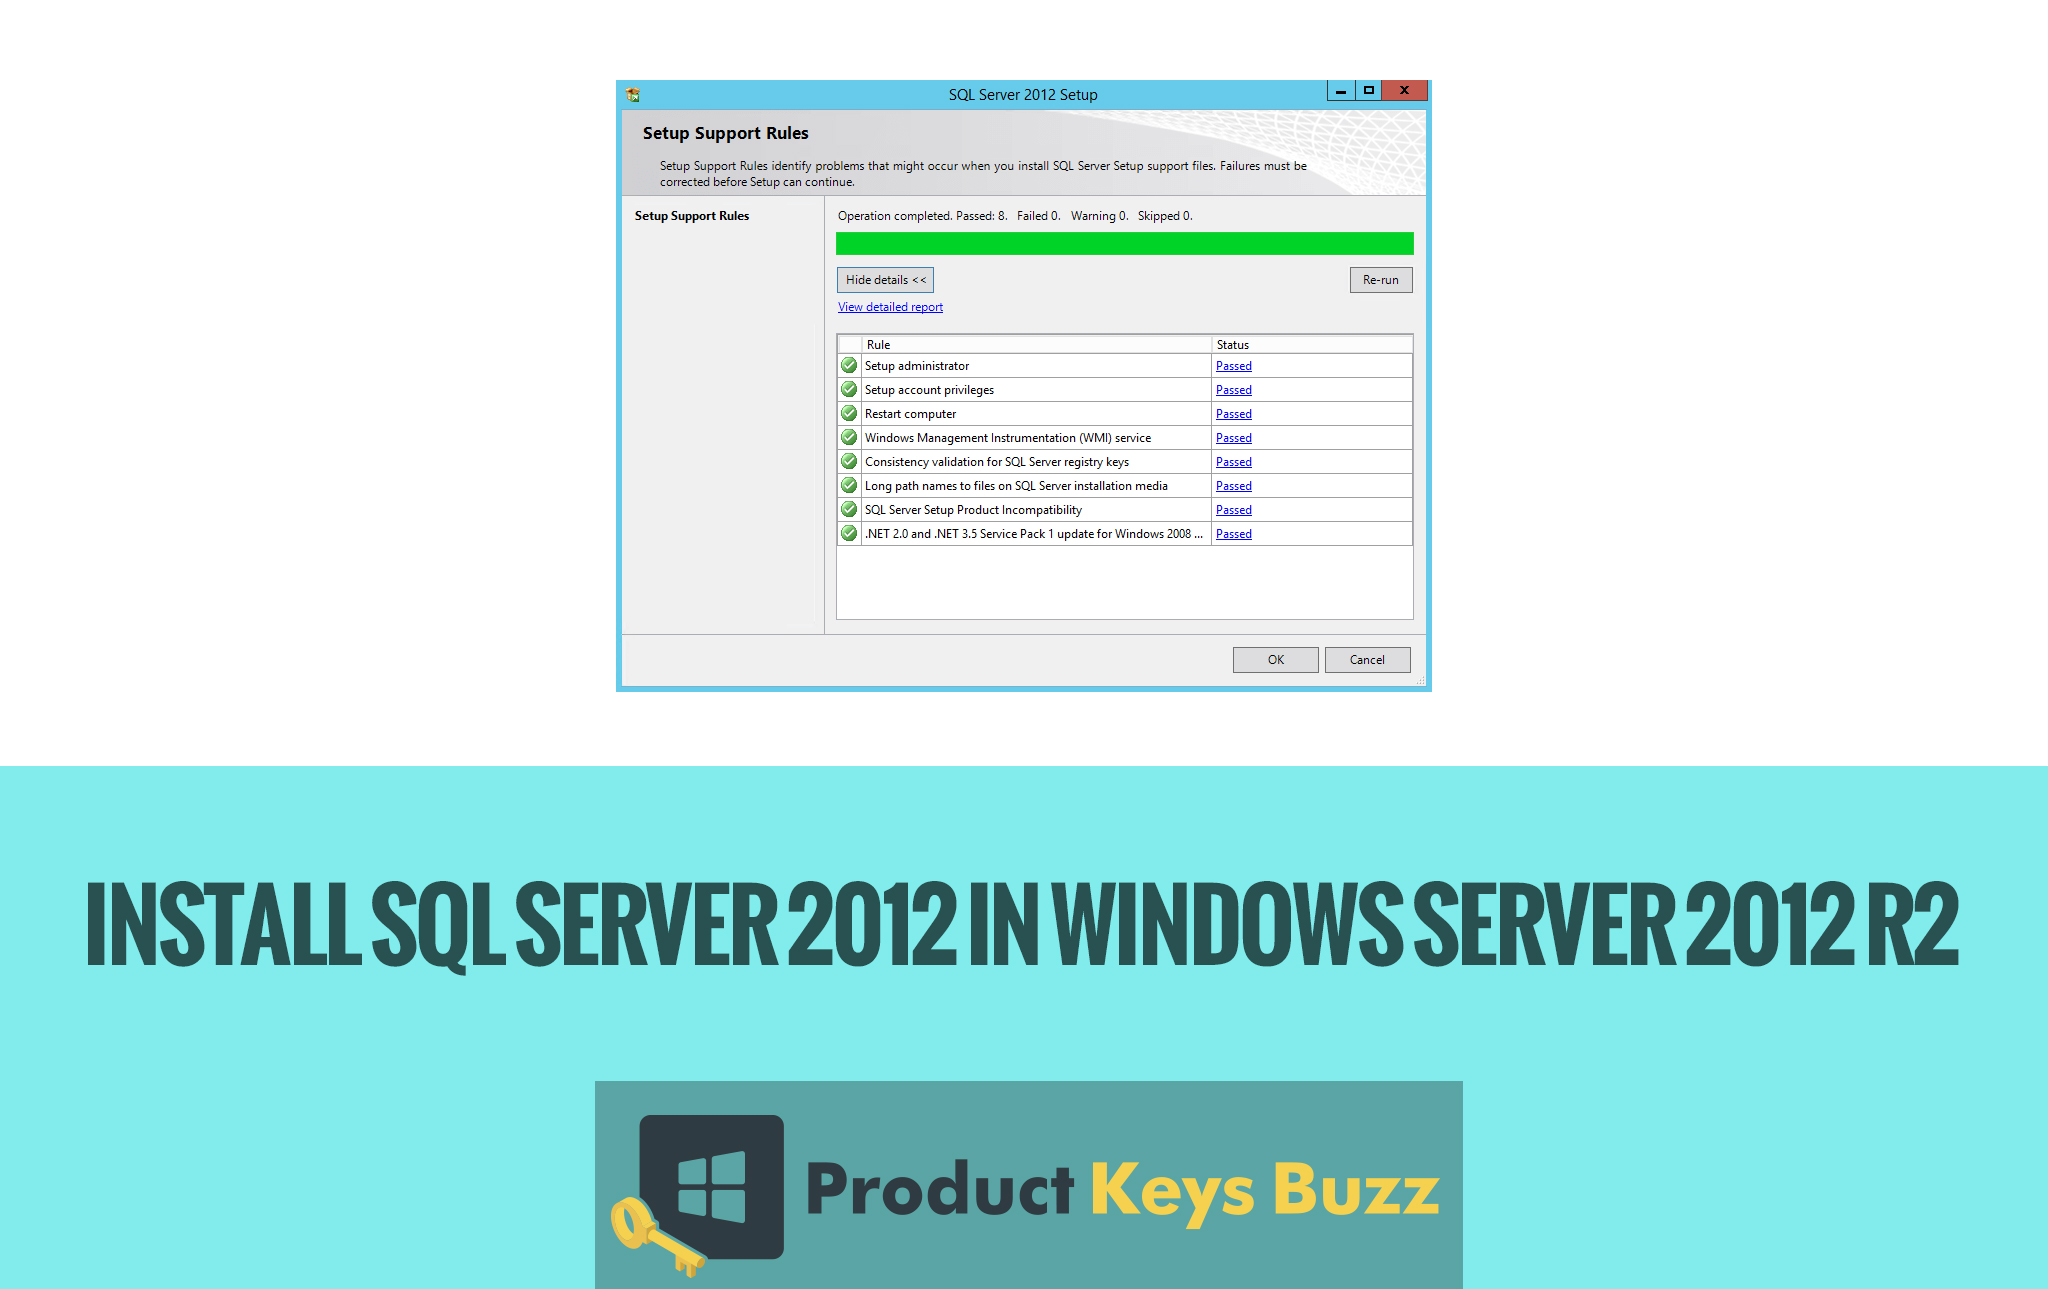
Before installing the SQL server 2012 it is always important to know that the computer or rather the windows server has the important components that are important for it. If not, then it is always advised to follow the important things.
- At first, it is vital to download and install the .NET framework 4.0 if the computer has a good internet connection or network. SQL Server will be downloaded whenever needed.
- In the next step, enable .NET framework 3.5 by using the control panel> programs and features > and then turn on/ off the features if required.
Now it is important to move to the next stop for installation.
- First login to the Windows server with the help of the administrator user.
- Now download the proper SQL server with the help of the link.
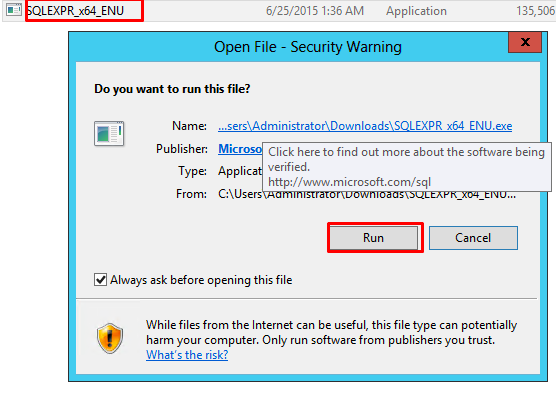
- In the next step, it is advised to double click on the installer file and then run on the click option. The image will appear like this,
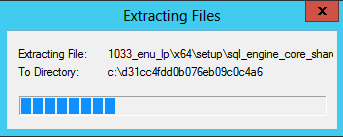
- Soon it will be noticed that the setup file will start extracting the installation files. The extraction files will appear in this way.
- In the next step, it is advised to choose the top option for installing a new standalone installation by simply clicking it. The next image will make the whole thing absolutely clear before the user.

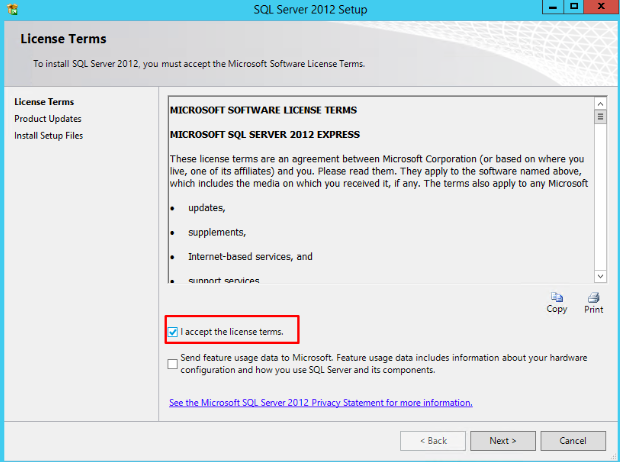
- The setup that has been seen will process the basic operations and thus the user will see the licensing screen when the user has to check the box and see the message” I accept the licensing terms”. On viewing it the user has to click on the next option Now let’s have a glance at the next image.
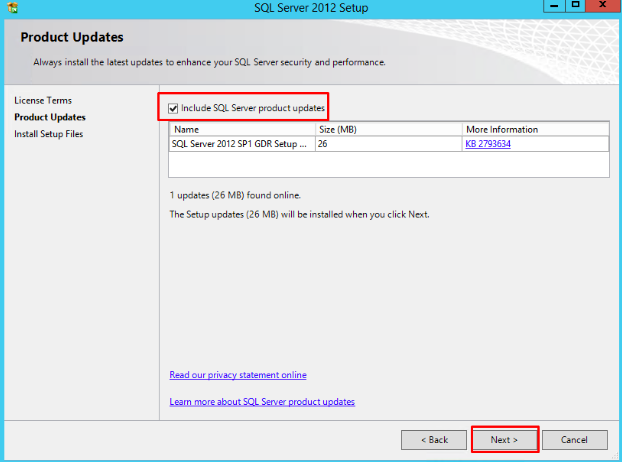
- The next screen that will appear is purely on the Product updates. Mainly the SQL servers will check for it and install the update safely. The user has to leave it in its usual position and opt for the next option. That will always be a wise decision in this case. Now below is the image that will exactly provide the actual image in an appropriate way.
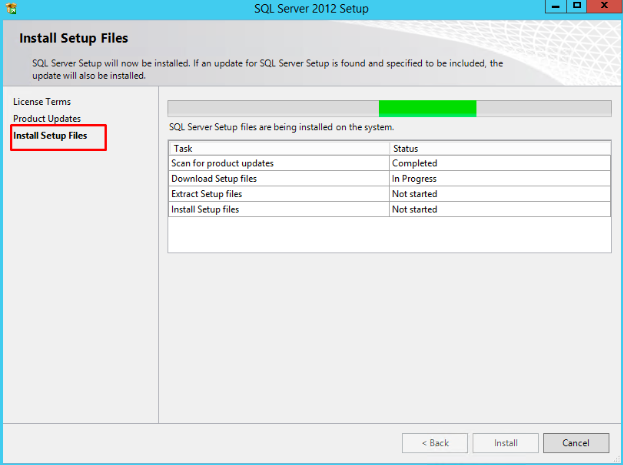
- In the next page that will appear on the screen, it will be seen that the whole set up is getting ready for the installation process. All the features that are displayed will function in a normal way. Just have a glance at it.
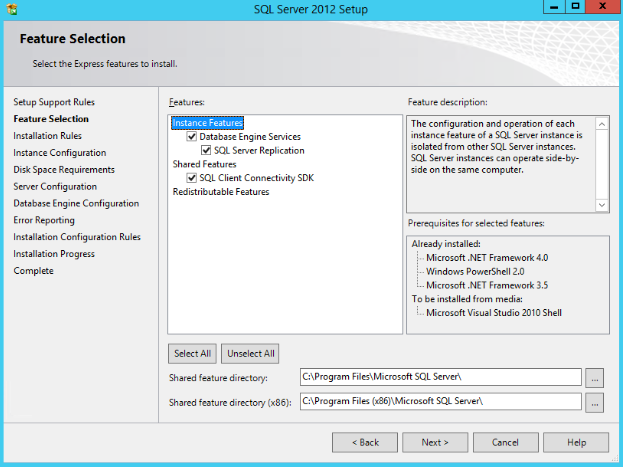
- In the next page, a feature page will appear and it is required to select the features as desired by the user. In many cases, it has been found that each feature will appear on the “feature description” area once you will click on the feature. It is best now to click on the next level. It can be easily understood from the next image.
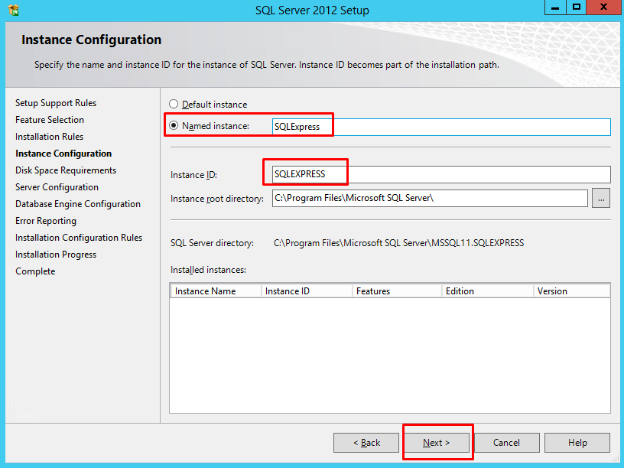
- An instant configuration page will appear and now it is best to choose the name for the instance or select a default instance. In most of the cases, SQL express is the name of the instance as we have already selected Named instance. Click on the next level to see it properly.
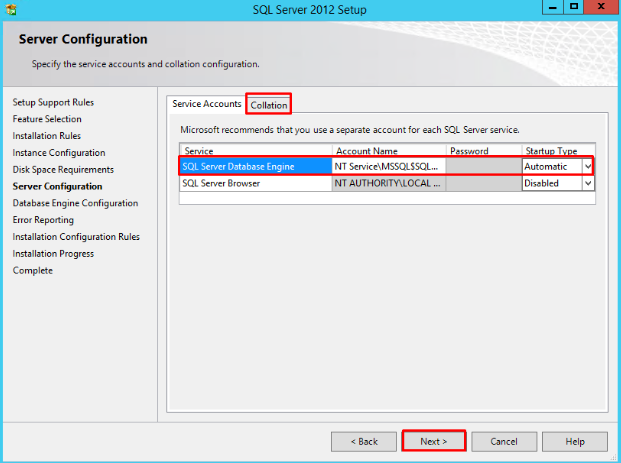
- The next step that will appear on the screen is the server configuration. It is the place where one can change the Windows services that are associated with this instance of SQL Server. The user can keep the defaults unless and until the user wants to specify different user accounts for the services. If required now the user can change the default collation settings provided the user is not in the United States. Simply click on the next option to continue the whole thing.
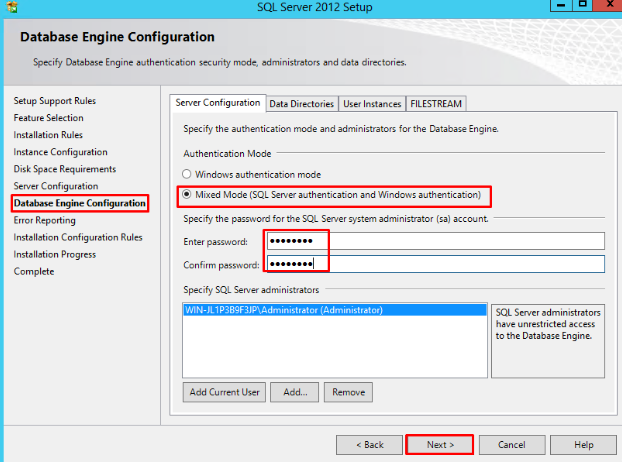
- The next step that will appear on the screen is the Database Engine Configuration. It is on the server configuration tab the user can select whether SQL Server will only authenticate using Windows accounts or the user can choose the Mixed Mode that will allow Windows accounts and the SQL accounts too. Usually, mixed-mode authentication is used so it will be selected. Provide the password for the user and click on the next level. There is an image that will provide the whole thing clearly.
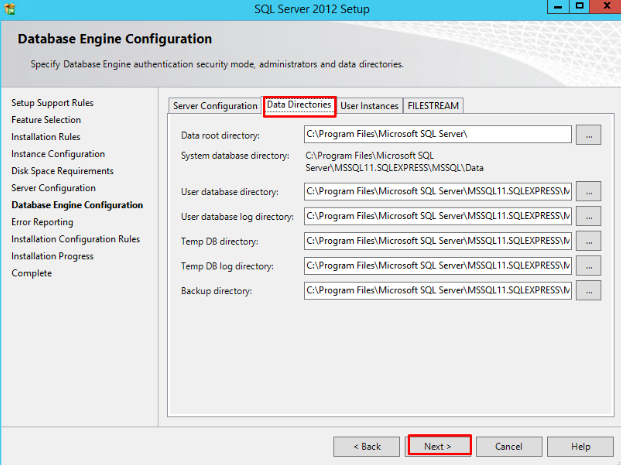
- Next, on the data directions tab the user can change the locations of the log files and another type of files that SQL will use. On the base of server configuration and the load that will be put on the SQL, the user can put the database and log folders on the separate drivers. Most of the users mainly opt to leave for the default values. Click on the next level to proceed further in this process. Now let’s have a glance at the relevant image.
- The next screen that will appear on the computer is the Error reporting option. The user can choose whether or not they would like to send error reports directly to Microsoft. Now click on the next level. This is a very good step in this matter. In most of the cases, it is seen that all the steps mentioned above are related to each other.
- Most of the SQL server will be installed on the computer very easily. The whole process may take a long time in this case. However, the whole thing depends on the computer or device mainly. In fact, a good image will also make the whole thing clearer.
- The moment installation process is completed the user will notice a receive a screen that will show the details of what was completed. In case if there is a problem then that will also be displayed on the screen.
In fact, the above-mentioned steps are mainly required for setting up SQL inappropriate way. Apart from all this, all this has been possible only due to the advanced techniques and devices. All these advanced things have made the work much simpler and easier. It is expected that in days to come these will benefit many working professionals in the field. It is a really good invention.
Read more: How to Recover Your Windows Password?



![[Today's Working List] Windows 10 Product Keys & Activation Methods for (32/64bit) Home + Pro Keys](https://productkeysbuzz.co/wp-content/uploads/2019/07/Windows-10-Product-Keys-Activation-Methods-for-3264bit-Home-Pro-Keys-150x150.jpg)


