Using a Wi-Fi network is very convenient instead of using several wires. It will also allow you to move the laptop wherever you want. So the Wi-Fi feature is very important for every laptop but if you have Windows 10 then you can face an error where the Wifi won’t work and it will not have any valid IP configuration. Hence an error message will pop every time. Due to this error message, it will make you face a lot of difficulties while using your laptop. The first thing will be to interrupt you from using the internet. The other problems that you might come across are mentioned below:
- Due to the issue with the security settings or antivirus, you can see that the IP configuration of your Windows 10 is not valid. You can easily fix this problem by disabling the anti-virus.
- If a message is popping where it indicates that the Wi-Fi does not have any valid IP configuration, then the reason behind it is the drivers. So you will need to update drivers for preventing this issue. With the help of the latest version, there are no chances of facing this problem.
- If it shows that the Wi-Fi does not have any valid IP configuration, then there are different types of error which can occur and for fixing them all the solutions that are needed are stated below.
How to Fix: Wifi doesn’t have a valid IP configuration windows 10
Solution 1: (Fixing the IP)
There are several times when you will face the issue with IP configuration because of the security type. Make sure that the security type of the PC is matching with the router’s security type. In order to configure it, you will have to open the page of settings of the router. Then you will need to visit the section of wireless where you can verify the security type that you are using currently. Now you will have to ensure that the wireless adaptor which you are using currently is having a similar security type. Because of the IP configuration problem, you will face a lot of difficulties when it comes to using the internet.
Solution 2: (Fixing the DHCP)
DHCP is responsible when it comes to assigning different IP addresses to the devices which will help in connecting to the network. When the DHCP is not working properly, then you will face different types of problem. In order to reduce such problems, you will have to ensure that the DHCP has been enabled and at the same time, you can also troubleshoot the network connection by following the steps that are mentioned below.
- The first time will be open the network connections.
- You will have to locate the network adapter by right-clicking on it and from there you will have to choose the option Diagnose.
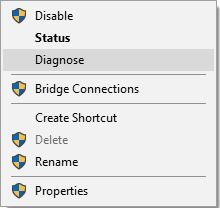
- You will have to wait until the scanning is completed.
One can also set IP addresses in such a way that it will be obtained automatically which will help in turning on the DHCP. Make sure you are always checking that the DHCP is enabled.
Solution 3: (Uninstalling the wireless adaptor driver)
Many users have claimed that they were able to manage this problem after uninstalling the wireless adapter driver. So the steps that you need to follow are stated below.
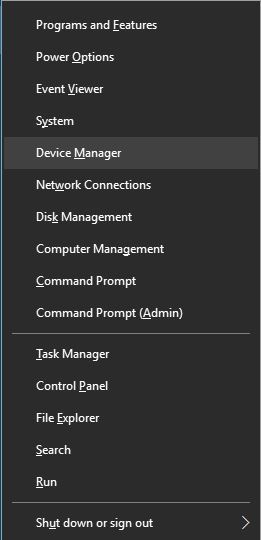
- At first, you will have to press the window key + X and then you will have to pick the Device Manager.
- In the device manager, you will have to locate the wireless device by right-clicking on it and then you will have to pick uninstall.
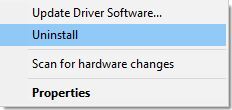
- You can also see whether the Delete Driver Software For This Device is available or not. If it is there, then you will have to click OK.
- When the driver is completely removed you can restart the PC.
After the PC has successfully rebooted, the Windows 10 will start to install the wireless default driver automatically. If you see that the driver is working properly then you can use it, otherwise, you will have to uninstall it again and download the latest version of the driver.
When it comes to upgrading the drivers it is quite an advanced process. Make sure you are being very careful while performing this process because any minor change can lead to permanent damage to the system. Any version of a wrong driver can cause a lot of problem in the system. You can use several tools for downloading the drivers automatically on the PC.
Solution 4: (Changing the password and wireless SSID)
You can easily fix this problem if you can change the password and the wireless SSID by accessing the modem. In order to change the configuration, you will have to connect PC with the modem by using the ethernet cable. It is one of the simplest solutions which is there in this list. In order to do it efficiently, you will have to check the manual of the modem.
Solution 5: (Resetting the TCP/IP)
Solution 5 is one of the crucial solution as well as the simplest one. Here you will have to reset the TCP/IP. The steps that you need to follow are stated below.
- At first, you will have to start the command prompt as the administrator. Now you will have to press the window key + X and from there you will get a menu from where you will have to pick command prompt.
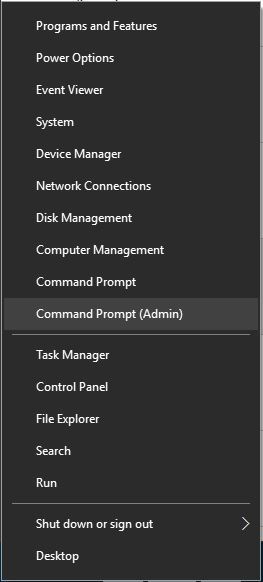
- After opening the command prompt you will have to write several lines which are- netsh Winsock reset and netsh int ip reset.
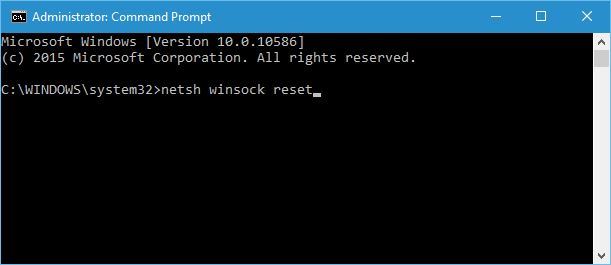
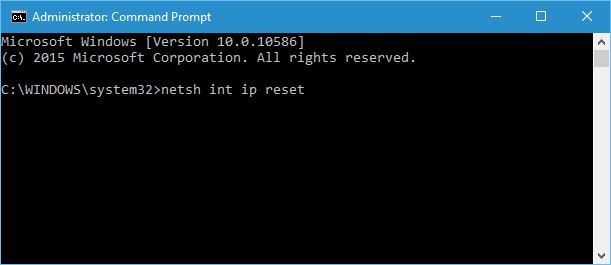
- After closing the command prompt, you will have to restart the PC again.
If there are any IP configuration issues, then this step easily solve it. If you are using the static IP address then you will need to set the configuration again.
Solution 6: (Setting the Width of the channel)
Another solution which you can try is to set the width of the channel to auto and for doing that you will need to follow the steps that are mentioned below.
- You will have to press the windows key + X from where you will get a menu. From this menu, select the network connections.
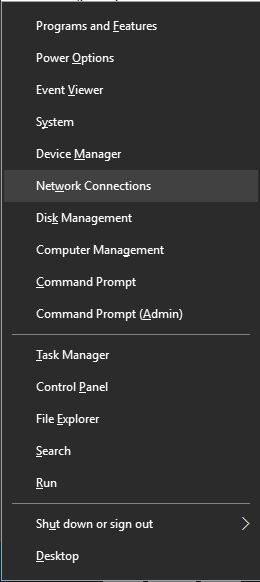
- After the window of network connection opens you will have to right click on the wireless connection for selecting the properties from the Menu. By clicking on the configuration button you will have to go to the tab of advanced.
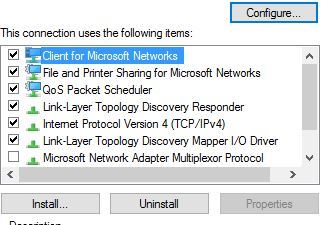
- Now you will have to locate the channel with 802.11n for the band 2.4. You will have to set this to auto.
- Now click OK for saving the changes.
Solution 7: (Removing the anti-virus or firewall)
Because of the firewall or antivirus software many people will find that they are being unable to use the internet connection. In order to get rid of the situation, you will have to temporarily remove the anti-virus or the firewall. Any type of anti-virus software is capable of causing this problem so you will have to remove any type of third party tool or antivirus. So once you see that the problem is fixed by removing your antivirus software then you can easily install the newer version of the anti-virus or you can switch to any anti-virus software.
It is always recommended to change the anti-virus and go for the one that comes with several functionalities. Opt for the one that will optimize the activity of the computer processors and will prevent your machine from facing similar types of problem.
Solution 8: (Perform the clean boot)
If you perform the clean boot then it can help you to solve this problem. For clean booting, you will have to disable all the services and applications of the third party which might interfere with the wireless connection. After this, you will need to follow the steps that are mentioned below.
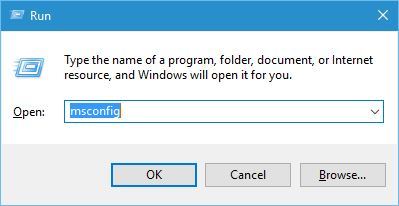
- First, you will have to press the window key + R on the keyboard. Now you will have to enter msconfig. After this, you will have to click OK or enter.
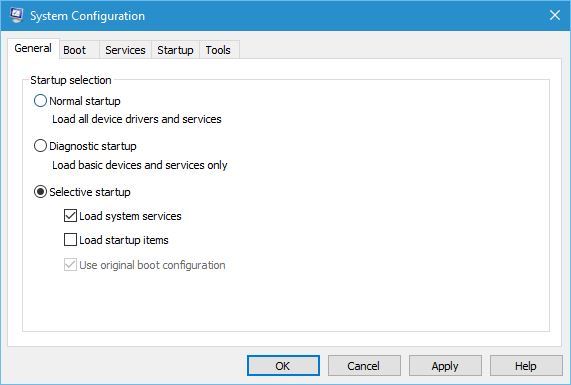
- When the window of Windows Configuration will open you will have to select the option Selective Startup and the Uncheck Load Startup Items.
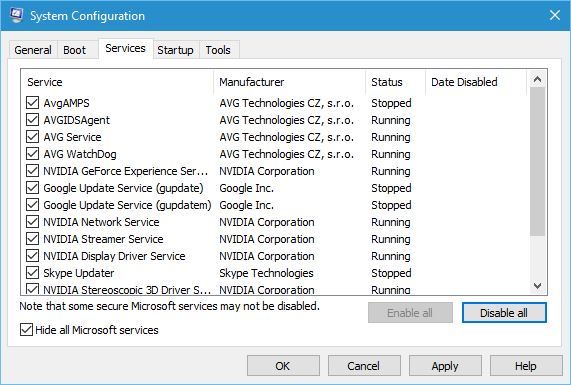
- Now you will have to visit the service tab and check to Hide All Microsoft Services along with Disable All.
- Go to the startup tab and from there you will have to open the Task Manager.
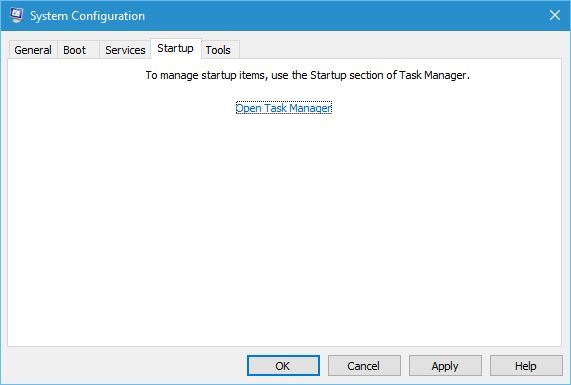
- After opening the task manager you will get a list of several startup applications. Pick each of them and disable them.
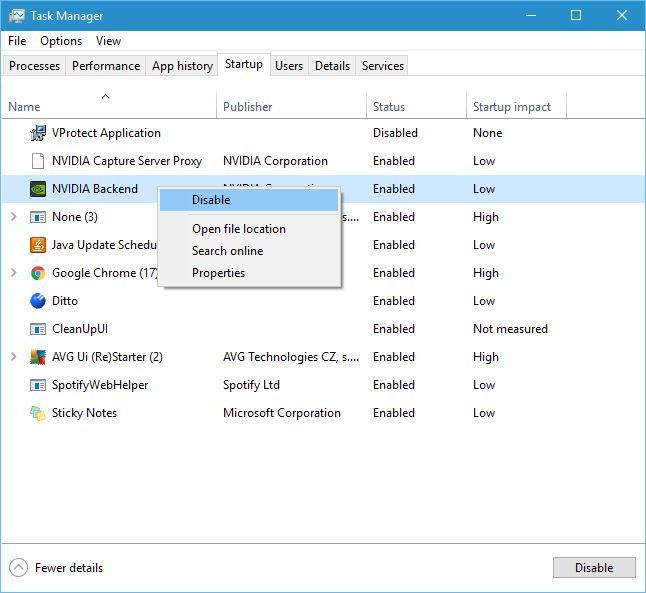
- After disabling all the startup application you will have to close the Task Manager. Now you need to click on the Apply or OK button in the window of Windows Configuration.
- Now you can restart the computer.
Once the device gets booted you will have to check whether the issue has been resolved or not. If you see that the problem is resolved then you will want to enable all the disabled applications and services. Now you can find the reason that was causing this issue and you can update or remove it accordingly.
Solution 9: (Set the IP address manually):
Whenever you are connecting to the wireless network, an IP address is given to you. This process is accomplished by DHCP but if you see that there is an issue with the DHCP or the configuration then you will have to set the IP address manually.
- You will have to press the Window Key + X. From there you will have to choose the network connections.
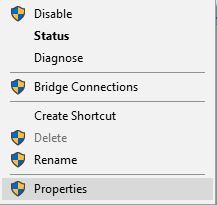
- By right-clicking on the wireless network, you will see a menu from where you will have to choose properties.
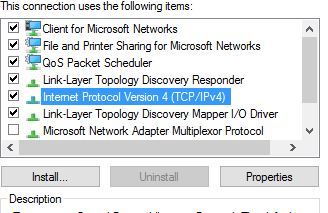
- Now you will have to select the internet protocol version 4 of TCP/ IPv4.
- After opening the windows of properties you will have to select the option of Use The Following IP Addresses. Now you will need to provide to the subnet mask, default gateway, and the IP address. You will also have to provide the DNS server.
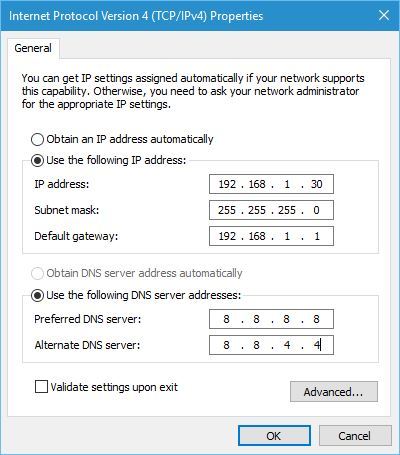
- After completing this step you will have to click OK.
Now you can easily access the router and then turn off the DHCP. You can also use it for assigning the static IP address to the PC.
Solution 10: (Increase the count of DHCP)
One can also fix this problem if they can increase the count of DHCP users. There are several routers that come with the limitation of 50 DHCP users, which is why it can cause the problem of Wi-Fi doesn’t have a valid IP configuration error. For fixing this problem you will have to access the router and then manually increment the total count of the DHCP users. Most of the users have seen that the issue has been resolved after using the solution.
Make sure you are checking the manual before performing any type of configuration changes in the router. You can also fix this problem with IP configuration if you can increase the total count of the wireless users. Most of the routers will come with the limitation of 10 users. You can use this solution to resolve this problem.
These are the top 10 solutions that you will have to follow if you want to change this error option. Don’t keep on trying all the options without having any prior knowledge of the condition of the machine. Always start with the ones where you will have to verify whether a certain feature of your computer is enabled or disabled.
When it comes to accessing the router always use a manual in order to do it efficiently. It is also stated above that if you bring new changes to the configuration then it can also corrupt the system, so make sure you are aware of it. If you see that the steps that are mentioned above are not working for you then you will have to ask for the help of someone who is skilled in this field. It is quite a common problem and which is why there is a huge community which can help you out with this problem.
There are high chances that the solutions which are provided above will help you to resolve the problem. Accessing the internet is very important for any laptop and which is why any problem to it can hinder your activities and which is why it needs to get fixed properly.
Table of Contents

 Fact Checked By: