
The modern work of computer application is gradually changing and so it is very important to get well acquainted with it. Most of them are very easy and simple. Rather the steps that are mentioned in different sites make the whole thing absolutely clear. Even there are certain terms and things that the user should equally keep in mind. It can also help in better knowing the subject. Let us go deep into the subject, but before it, one must know about the actual process and working of GPO.
Well, Group policy or GPO is such a thing that can be applied to a computer very easily. It can be done in a very simple way. One has to only link the computer GPO with the computer OU. A policy will be enforced to all the computers that mainly reside under the OU. However, if there is any specific type of policy only for a few computers, then all these computers must be grouped together under the Active Directory Computer Group. In the following par, we will mainly concentrate on the steps that are used to apply GPO to Computer Group in Active Directory. The steps that are discussed are much more efficient and effective. Please go through the steps so that the whole mode of working becomes much simpler before the user.
How to Apply GPO to Computer Group in Active Directory?

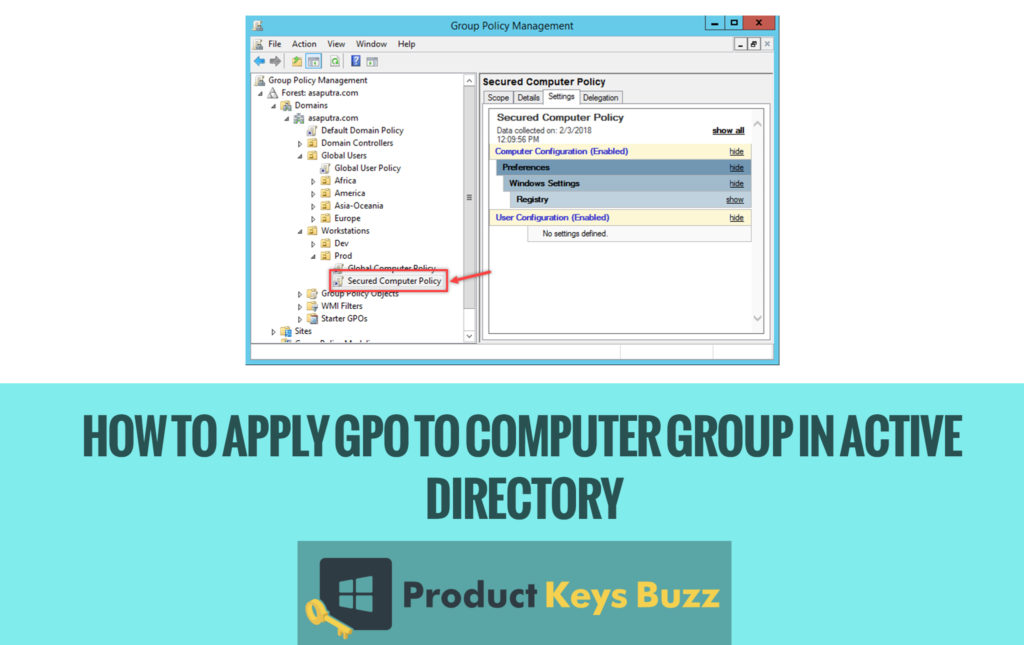
- Take for example here, all the computers are joined to a domain name as asaputra.com and the domain name controller is mainly installed on the Windows Server 2012 R2. All the client computers that are running in Windows 10 is located on Prod OU. Just have a look at this image and all the things will be bit cleared.

- In the next step, a group policy object named Secured Computer Policy has been created and they are linked with Prod OU. The GPO by default will be applied to all the computers in the OU. This is the picture in the next step.

- It is mandatory to create a group on OU where the policy is to be linked. Now open the OU in the Active Directory Users and Computers and then right-click on the empty area and then select New> Group.

In this situation, the user should specify the group name and also select the group scope Global in which the group type will be security. Now click OK to save the buttons and also verify the group that has been created. The following picture will make the concept clear to the user.

- The user has to double click the group name to open its properties. Then select the member’s tab and click on add button. The user will notice that a window will pop up and soon the user has to click on the object type button to make sure that the computer is ticked.
- Now again type the targeted computer names with a separate semicolon and click on the check names button. If the whole thing is typed correctly, then the names will be underlined that is shown in the picture. Please have a look at it.

- Also, make sure that the entire targeted computer has now been added to the group and then click on the OK button. In fact, the OK button should be clicked once everything is made sure and clear. Never click randomly as they can bring big problems and it might take several times to clear the whole one.
- The next step will be followed by switching on the Group Policy Management Console. Then select the project policy that needs to be modified and ultimately select the scope tab. The tabs that are mentioned should be clicked after going through the subject.
- Also on the security filtering section select the Authenticated group users and simply click on the remove button. Still, on the security filtering section click on the add button.
- Type the group name that was created in the early steps. Make clear that the whole thing is typed clearly. It can be done by clicking on the change names button and then click OK to confirm.
- Also, verify the group that has been added to the list. Verification is a very step that is related to this thing. If required the verification must be done several times for maintaining the transparency of work.
Check here, How to Add CNAME Record in Windows DNS Server [Complete Guide]
Verification process:
The verification process is the most essential one in this situation. It can help to check that the policy has been applied correctly. It can be done on the client computer by opening an elevated command prompt and apply the command gpresult/r/SCOPE COMPUTER. In the following image, the whole thing is clearly explained. here you will get the Steps to Configure Aging and Scavenging in Windows DNS Server.

But if the computer is from the outside group then the policy will show that the result is filtered out.

The user should always bear in mind that the steps to apply GPO to Computer Group in Active Directory may be a tricky matter. If it is observed that the GPO is being filtered out on a computer, then there is a high chance that the computer was not realized that was in the group. In such a situation a reboot is important for the computer to refresh its group membership in a clear way.
At the same time, it is equally important to note that the authenticated users will need to have at least read access to the policy. It can be done by simply going to the delegation tab and then click on the add button.
So with these steps, the whole process becomes very clear and easy. It may apparently appear tough before the user, but in the long run, the whole thing is as simple as anything if it is done after going through the steps. In fact, with the changing world, it is very essential that the user have a clear knowledge about the subject and that will make the entire work easier before the people. So the above-mentioned step is really helpful in all aspects.
Check here, How to Enable Event Logging in Windows DNS Server