
It has been seen that both the aging and scavenging provide a mean for both the automatic removal of old and unused records primarily from DNS. It reduces the rock that is required to keep the database up to date. If not configured properly, aging and scavenging can cause more problems than they solve.
How to Configure Aging and Scavenging in Windows DNS Server

What may be the main reasons to configure aging and scavenging particularly in DNS Server:
The main reason for why one should configure aging and scavenging in Windows DNS Server is to get rid of old and unused records. Stale records are dynamic records that have already passed the aging interval. It is not always a good idea to keep such records as they mess up the name resolution. It is the only danger that is expected of them. Apart from this, a wrong name resolution may also lead to a bigger incident in the network that would turn out as a nightmare before the administrator. There may be a bad impact on the performance if there are ample stale records on your DNS. Always keep one thing in mind that stale records will stay on the server if we do not conduct scavenging of the server. So, it should be either by the administrator on a regular basis or the same should be set for automatic scavenging.
In order to conduct configuring of aging and scavenging the following high-level steps are required. These are,
- First set the aging and scavenging properties of the zone to be scavenged. Alternately, the user can also set the aging and scavenging properties of the server.
- On the other side, the user can also set the scavenging interval and enable scavenging particularly on the server.
Read more: Steps by Step Guide to Install VMware vSphere ESXi 6.7
Steps to configure aging and scavenging in Windows DNS Server:
It is very important to understand the concept of DNS refresh and update before entering deep into the subject. The aging interval is basically the sum up no-fresh interval and refreshes interval. Now, what is no fresh interval? It is a period of time that is given to a record before the aging process is started. The record that takes place within the no-refresh interval is not at all subject of scavenging.
On the other part, the refresh interval is the period of time that is required to renew the timestamp of a record. If the timestamp renewal takes place due to record refresh then the record will re-enter the no-refresh interval from the beginning. Now let’s have a glimpse at the steps that are required to configure aging and scavenging DNS Server.
Read more: Install Remote Desktop Services in Windows Server 2012
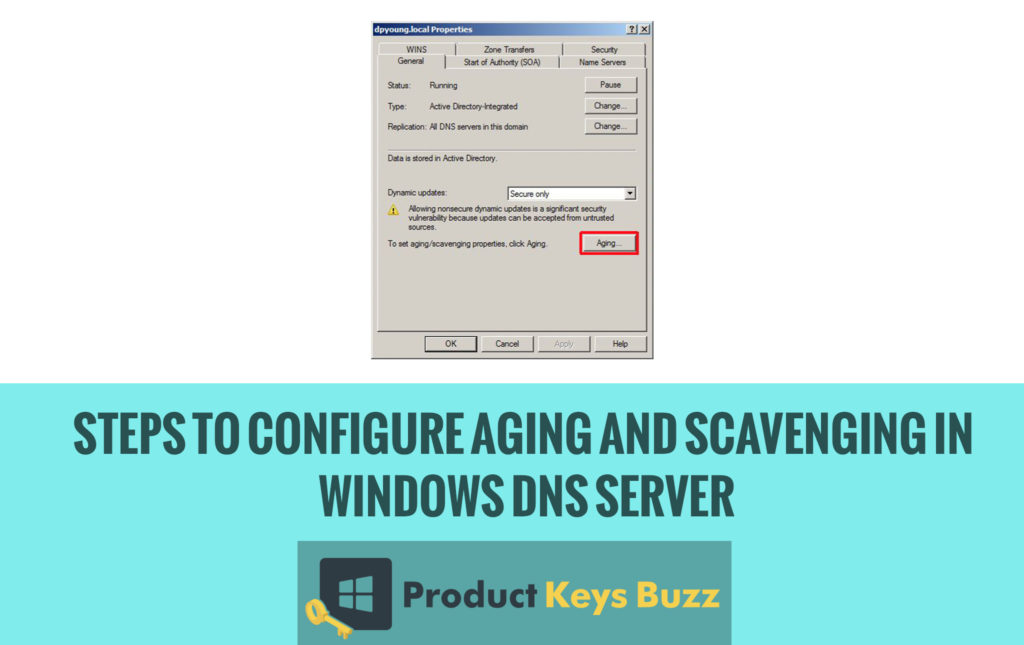
- The user can configure aging on a specific zone or on the DNS server itself. When configuring of DNS server is done, it means that it will be applied to all the zones in the server. Take for example if we want to conduct aging on a specific zone with the name of mustgreek.com then the user should right-click on the zone name and select the properties.

- Next on the General tab simply click on the Aging button. The below picture will make the conception clear.

- The user will see that aging properties window will appear on the screen. In this window there are a few things that the user should conduct. Firstly, they should tick on the option to scavenge stale resource records. Remember, it will not enable scavenging but it will allow scavenging of stale records.
- Next, the user should fill in the no-refresh interval. It can be set to 3 days.

- The user should also fill the refresh interval. It can be set up to 4 days. It mainly depends upon the user. The below configure will make the steps easier for the user to understand.
- Scavenging can be enabled on the server level to completely delete the stale records. It simply implies that scavenging will be applied to all zones in the server. On the other side, if the user does not configure aging interval on a zone then scavenging had nothing to do on that zone. Scavenging is even not applied to records on a zone when scavenging is not at all configured. It is also not applicable on a no-refresh or refresh interval. Further, scavenging is not at all applicable to static records that do not have a timestamp.
- The following steps to apply scavenging schedule on DNS windows server is quite easy. On the DNS Manager the user should right-click on the server name and then on the Properties. Have a look at the below image and everything will be cleared.

- Next, go to the advanced tab and then click on the option to enable automatic scavenging of stale records. Also, define the scavenging period as per your demand and need. Please have a look at the below picture where we have set it for 7 days.

- At the same time, the user should also activate the option of automatic scavenging on the server. It is very essential and should be done along with the other steps. The user can also set the server’s scavenging interval and enable scavenging. It can be done with some simple steps.
- First, the user should open the elevated command prompt on the DNS Server and then type dnscmd /config /scavenginginterval <interval> for setting the scavenging interval. It can be set as per the hours or according to your wish.
So both the aging and scavenging is presumed to be the best way to get rid of stale records. Even a few days earlier, it was quite tough to get rid of such problems, but it is really a very easy matter. Scavenging is nothing but a process of deleting the stale records properly. It must be now clear to everyone that any record that has passed its aging interval is actually eligible to be deleted especially during the next scavenging period. It is also expected that this piece of information can now solve the matter completely. It may be very easy for everyone to clear the issue in an easy manner.
Read more:
- How to Configure Stub Zone in Windows DNS Server [Complete Guide]
- How to Disable File Download in Internet Explorer using Group Policy
- How to Enable SSH in Cisco IOS Router
- How to Configure Static IP Address in CentOS
- How to Fix Windows Audio Device Graph Isolation High CPU?
Table of Contents