The recent achievement in the case of VMware is that it has launched the recent version and the new one is with advanced features and improvements like bug fixes and above all it is ready to provide more stability. It is basically the new version of Vsphere. In this phase, we will mainly see the steps that are involved in installing VM ware Vsphere ESXi 6.7. The installation process of ESXi 6.7 is same as per the ESXi. There are no such vital variations that are mainly observed except a few things. VMware Vsphere and ESXi are considered to be a very popular hypervisor that is mainly used by the companies. Rather, such companies, mainly depend upon them to carry out the work smoothly. Now let’s have a look at the following steps that are mainly involved for installing VMware Vsphere ESXi 6.7.
Step By Steps Guide to Install VMware vSphere ESXi 6.7

Step 1:
If the user is using Dell, HHP or Cisco CS Blade servers then it is better to mount the ISO image into the virtual media by connecting it to the ILO, or UCSM or KVM console.
- The first step should be followed by downloading the ESXi 6.7 ISO and make a bootable CD or DVD.
- Then the user can directly use the virtual mounting by a virtual image.
- In the next step the user should mount the ESXi ISO directly to the server.
- Now start the server and boot from the CD/ DVD.
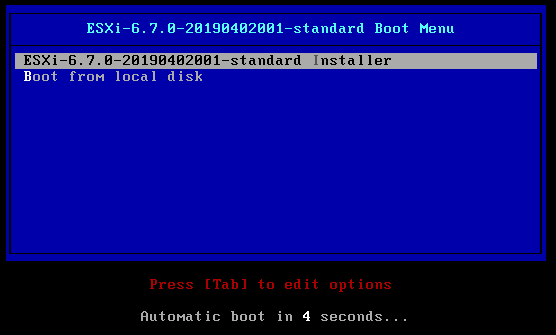
- A screen will be seen at the time of booting and the user should press the Enter option on the ESXi 6.7. The below image will provide the above step much more clear and easy.

Step 2:
In the next step the user is directed to press enter to continue the whole process. Once enter is pressed the user will notice the changes step by step.
Step 3:
A license agreement will appear on the screen and the user is directed to press F 11 for accepting the license agreement and continuing the process in a normal way. If required the user should also follow and read the terms and conditions that appears on the screen. It is mainly done for the safety of the user and it is better to read the agreement before clicking it properly.
Step 4:
In the next step the user should select the disk on which they want to install ESXi 6.7. The moment the disk is selected the user should press enter and continue the whole process safely. Selecting the disk will also appear on the screen and so it will also assist the user clearly in this case.
Step 5:
In the next process, there are various types of keyboard layout that will be appearing on the screen. Some of them are the Swiss French or Swiss German or Turkish or US default or sometimes Ukranian or United Kingdom. The user can choose it as per the requirement and press the Enter button. Selecting the keyboard layout fully depends upon the user.
Step 6:
The user in this step should set the root password and press enter to continue the whole process. If anything appears on the screen, then the user should go through it properly and then opt for it.
Step 7:
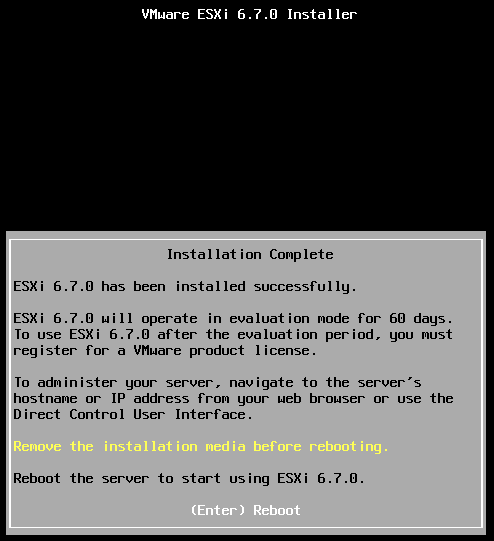
Finally F11 should be pressed for installation. It might take some time to install the whole thing. Once the installation process is over the user should press Enter to reboot the server. If the server is successfully rebooted, then the user can clearly see ESXi6.7 installed on the computer along with the memory details and CPU.

On the other side if the installation is completed then the user can press F2 to customize the system settings and also configure the Networking of ESXi. Sometimes it becomes mandatory in many cases. But configuring the network is one of the important steps that are involved in this part.
Read more: Install Remote Desktop Services in Windows Server 2012
Essential points connected with the installation process:
More often while selecting the disk to install or upgrade window the user can see that some local disks are attached with the server. Just have a look at it and then go for selecting the same. Even there is a series of step that is followed in the configuration process.
- Once the F2 is pressed for customization the user should authorize the password to login or start the customization process. Below an image is provided that will make the whole thing clear.Please have a look at it.
- Next on the customization window the user should select the option of Configure Management Network and then press the Enter option.
- In the next step on the Configure Management Network the user should select an IPv4 Configuration option and then press the Enter to change the IP.
- It is advised that on the IPv4 option the user must use the dynamic IPv4 address and network configuration option. It will be much better and safe at the same time.
- The user will also notice that by default IPv6 is enabled on the server and the user should then select the IPV 6 Configuration and press the Enter option.
- It will be found that on the IPv6 configuration window the user should use the dynamic IPv6 address and the network configuration.
- The next step is followed by the Configuration Management Network window select the DNS Configuration and hit the Enter button to change the settings properly.
- It will be seen that on the DNS Configuration Window it is better to define the primary DNS Server along with DNS Server and hostname. Ultimately the Enter button should be pressed.
- The user will soon realize that IPv4 and IPv6 have been installed. Next press ESC to exit the console. It would restart the entire management network and reboot the host to apply the changes properly. So, the whole process is quite simple and easy in all aspects. It can be easily done by the user even if they are the first user.
Read more: How to Disable File Download in Internet Explorer using Group Policy
It may apparently appear the whole process to be a complicated one, but once started it will be completed soon. This type of systems and applications has really made work easier and smoother. Even a few days earlier people had to rigorously search for some methods that could make their work faster. However, now the time has arrived when people can take and apply such systems in a much easier way. We should really thank our advanced systems for making it so special. The demand of such systems is gradually increasing in due course of time.
Check here, A Complete Guide to PHP – A Server Side Scripting Language


